Showing posts with label reroot. Show all posts

Wednesday, April 18, 2012

Operation:Vampire Five

Dear Jill,

For a long time now I have wanted a vampire girl, and since seeing Coraline I know I DEFINITELY want one! She is so cute!!

My problem is I am too scared to buy a Blythe and customise it! Plus I don't have the money to spare if I get it wrong. But I also wanted to try something different from a Blybe/CCE, so I decided to customise a Jecci Five!

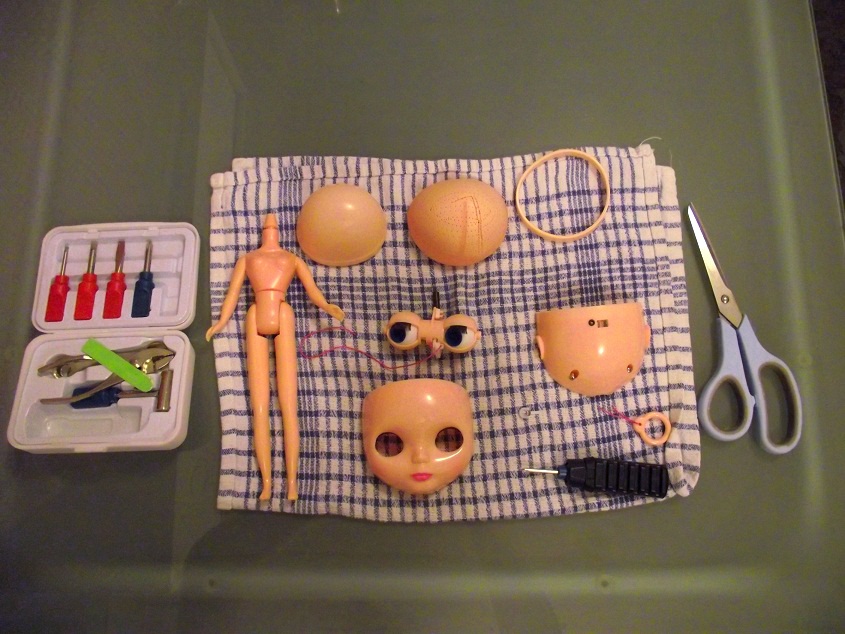
This is the girl I got from Ebay...


I chose her for her dress! Isn't it cute?! I want my vampire to have black hair, but again wanted to try something different from yarn. So I opted for mohair wefts, which I bought from Coolcat.

They all arrived in really good time, so I started straight away. My first big problem was trying to get the scalp off the dome - the scalp has flanges like a Blythe scalp and it was glued in...


After much forcing and prying, I got it free with minimal damage...


I removed all the hair, which was really well rooted...


...and prepared the mohair weft. This is what it looks like out of the pack...


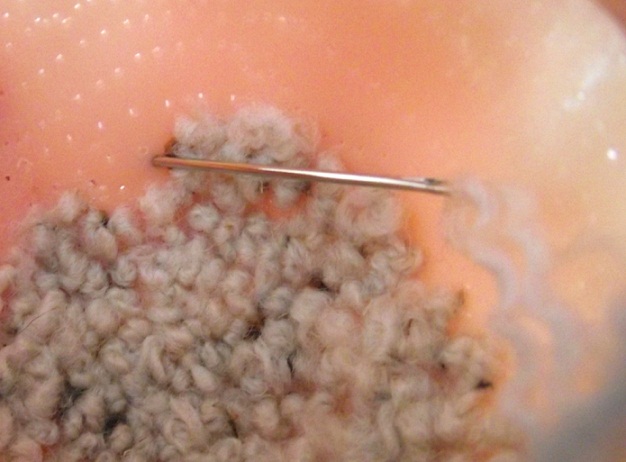
I have never used either wefts nor mohair before, so this was a totally new experience for me. I figured it would be best to start at the outside edge of the scalp, and sew it in quite tight with extra strength cotton and a thick needle...


I got about half the scalp done in the first sitting, but had to stop when my thumb just couldn't take it any more! So I left it, and returned the next day.

I got it finished in the second sitting, and all in all it only took about 3 hours to complete the whole thing!


I would definitely use wefts again! It was so easy! At the moment it just looks like a big mass of black fluff...


Lol! I will style it when I put her all together again. I aim to pull it into little bunches!

I then moved on to the face up, which I will tell you about a little later on :)

Sarah
-x-

Monday, October 24, 2011

Tutorial: Yarn ReRoot

Dear Jill,

Finally, I have my pictures uploaded, so here is my Yarn ReRoot tute!


You will need:
. Yarn - For this method of yarn reroot I like to use quite thick yarn, like Aran weight. You could also use Worsted Weight. I found I could do a whole head reroot with as little as 50g.

. Yarn needle - Should be as thin as you can make it, whilst still being able to slip the yarn through the eye of the needle. And it should be quite sharp so you can make new holes in the scalp.

. Ruler

. Scissors


Decide how long you want the hair, than double it (We will be using the Knot Method, with the knot in the middle). Cut loads of lengths of yarn at this length. I usually make it abit longer than I really need it so I can trim it down later.


Next you need to split the yarn. The aran yarn I use 'splits' into 3 individual lengths of yarn. I think WW split into 4, I'm not too sure...

I do this by teasing the yarn apart at the top of a piece, seperating 1 strand, then whilst holding the other 2 strands, pull the strand downwards. Do it slowly! And don't pull it too hard or it'll break.

It takes a bit of getting used to, but it is do-able :)


Do the same with the strands that are left, so you end up with individual, thin, wavy lengths of yarn.


Continue with the rest of your yarn lengths, until you have a nice pile of strands.


Next: You need to figure out how many strands are going to make up 1 plug. This bit is totally up to you - it all depends on how thick you want the hair. I usually do 2 strands per plug.

Take your 2 strands (or how ever many you are using) and tie a knot in roughly the middle of the length. Thread one end through a yarn needle.

In this picture I have already done the parting, which is where I would start. After the parting I work from the top of the head downwards.

Take the needle and thread it through either an existing hole, or make a new one. You might need to make new holes if you are changing the parting line.

Pull the needle and yarn through the hole until you hit the knot.


Thread the other end of the plug through the needle and repeat, so you end up with 2 plugs for the price of one lol In my case, I used 2 strands of yarn for each plug, and there's 2 plugs, so that makes 4 strands of yarn/hair. Confused?! Lol!

Repeat along the part line and then the rest of the head. I space the plugs quite close to each other, to avoid gaps where you can see the scalp. It is quite time consuming - my first yarn reroot took a week. But with practice you can cut the time right down - I got my latest done in 2 days hehe!


Plat sections of the hair as you go, to avoid getting it all tangled up.

When you have completed the whole scalp, you need to un-plat it and thatch the parting.


Your end result!

I cut Liliths hair into a bob - it's very thick! It is great if you leave it long too - you can do all sorts of styles with it :)


I hope this was useful! :D

Sarah
-x-

Sunday, September 18, 2011

Fastest Reroot In Town...

Dear Jill,

As you know I have been bitten by the customising bug, but the problem I have is that I can't keep all the girls I want to customise as I don't even have enough space for the ones I have now! So a little while ago I offered to make my cousins Daughter, Katie, her own doll. She said she would like...

  • Green, shoulder length yarn hair with a fringe

  • Original Chips

  • Freckles!

  • Lilac Eyeshadow


  • I am also going to add...

  • Lip, Nose and Philtrum carving

  • New Clothes

  • New Licca Chan Body


  • I started work on her last week. First I took the whole doll apart...


    These are a pair of the original chippies she would like left in...


    And last night I completed my fastest reroot EVER! It took me 2 days! Yay! Here she is in the middle of the reroot...


    And here it is all finished...


    I am having a bit of a problem with the hair though. Katie wanted it shoulder length and it comes up a little short. So I might take the bottom 2 rows of plugs out and re-do them. My hair dressing skills are obviously not as good as I thought they were lol!

    Today I carved a new neck hole, sanded down the neck of the new Licca Chan body, and started on the nose. It's going well! More pics to follow!

    Sarah
    -x-

    Thursday, September 8, 2011

    Bumpy Head

    Dear Jill,

    Thank you for the pointers on the tiny scalps, it was really useful! I checked the full tutorial out and it makes me want to customise a Petite Blythe now!

    I managed, with some difficulty, to scalp Nicky on Sunday night. It was so fiddley getting to the roots on the inside of the head, and it was parted all weird too (you remember what her fringe looked like!). This is what the scalp looks like without hair...


    Look at all the massive holes! That line, unbelievably, was her parting!


    Note the odd bump at the top of the scalp. Weird...


    And I did similar to what the tutorial said - I clipped off alot of the manky plastic to make a bigger hole, whilst not taking it too far.

    I have so far plugged the parting and the bottom 2 rows of hair. More pictures to come when I have finished!

    Sarah
    -x-

    PS - I love the Rosie Apple and Friends blog! What a great idea to have your Blythe write for it sometimes!

    Wednesday, September 7, 2011

    Scalps

    Dear Sarah,

    I'm really excited to see what Nicky is going to look like when she's finished! I think the Plummy is going to be great, and I think an updo will be good as well, seeing has she has such a large forehead! Wonder what they did that for. (?)

    If you haven't started already, I found a tutorial on customizing petites and the scalp opening looks similar:


    She uses the Xacto knife to cut that part of the scalp off, being careful not to cut all the way through:


    Hope it helps, at least for next time!

    I also found a great new Blythe blog, Rosie Apples and Friends. Sometimes her girl Parkin blogs! Definitely check it out!


    ♥ Jillie

    Sunday, September 4, 2011

    Reroot Weekend

    Dear Jill,

    I am loving Corals new Milky Way Blythe eyechips! They really do go well with her hair, and also her personality! Can't wait to see them on her!

    I also really like your choice of CoolCat Chips, such lovely colours! When I've ordered from CoolCat before it hasn't taken too long for my items to arrive, so hopefully you should get them soon and have your Customization Weekend!

    I'm having a bit of a customization weekend of my own - tonight I am going to scalp Nicky, my Basaak Blyh! She came to me looking like this...


    ...and now looks like this...


    I plan on taking her hair out (which will be tricky - look at the scalp opening!!) and reroot her with some Sirdar Supersoft Aran yarn, in Plummy. I think I am going to cut it long, and put it in an up-do. Wish me luck!

    Sarah
    -x-